How to Record Guitar at Home: Beginner Guide & Free Tools | TONE3000
Learn to record guitar at home with this beginner's guide. Discover free tools, budget interfaces, and pro-quality NAM profiles to start tracking on TONE3000.
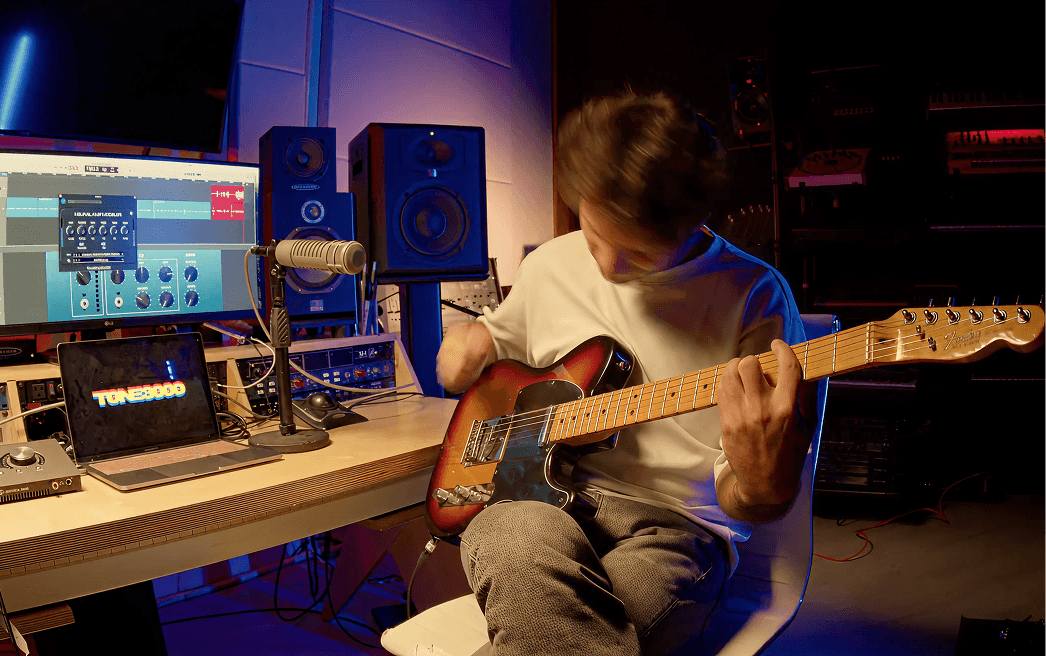
For many guitarists, learning to record can feel intimidating. Words like “sidechain compression” and “sample rate” sound like another language if you haven’t spent time in a studio. But don’t let that stop you. Today’s home recording tools are designed for musicians, not engineers. If you can learn to play guitar, you can absolutely learn to record.
All you need is a laptop, a modest interface, and the free tools available on TONE3000. Whether you’re capturing your first riff, recording full-blown demos, or jamming to backing tracks, this guide covers the basics of what guitarists need to start recording at home.
Start with the Right Interface
Your audio interface connects your guitar to your computer. Think of it as your instrument’s translator, converting your analog signal into digital audio your computer can record.
When choosing an interface, start by asking how many inputs you need. Budget options usually offer two inputs, good enough for guitar and vocals, but if you plan to record more instruments later, consider at least a 4–6 input model for flexibility.
Great beginner options include:
- M-Audio M-Track Solo – Affordable (less than $50!) and solid for direct guitar input
- Audient EVO 4 – Small footprint, but excellent preamps and auto-gain
- Focusrite Scarlett 4i4 4th Gen – Reliable, beginner-friendly, and pro-quality analog to digital audio conversion.
Choose Free or Low-Cost Recording Software
Once your interface is connected, you’ll need a Digital Audio Workstation (DAW) — the software that records, edits, and mixes your music. If you want to see a comprehensive list of the best DAWs for guitarists, we've got that here. There are excellent free and inexpensive options for guitarists. Some of these are:
- Reaper (free trial, then $60) – Lightweight, professional-grade, and NAM-compatible.
- GarageBand (Mac only) – Free, intuitive, and great for beginners.
- Cakewalk by BandLab (Windows) – 100% free and feature-rich.
- Studio One Pro 7 – An affordable, yet pro-quality DAW featuring a guitarist-friendly workflow.
All these DAWs can load Neural Amp Modeler (NAM) and Impulse Response (IR) files. That means once you start recording, you’ll have access to thousands of free amp captures and cabinet IRs on tone3000.com.
Recording Directly: The Smart Way to Start
Recording your guitar directly into your interface is the easiest, cleanest, and most flexible way to record. Plug straight into your interface’s instrument input, open your DAW, and enable a track. You’ll hear a clean “DI” signal.
This is where the magic happens. With a clean signal, you can apply amp sims, NAM profiles, and effects after recording, or even while you play. You can jam through headphones at night, change amp tones mid-session, and never have to re-record when you tweak your sound.
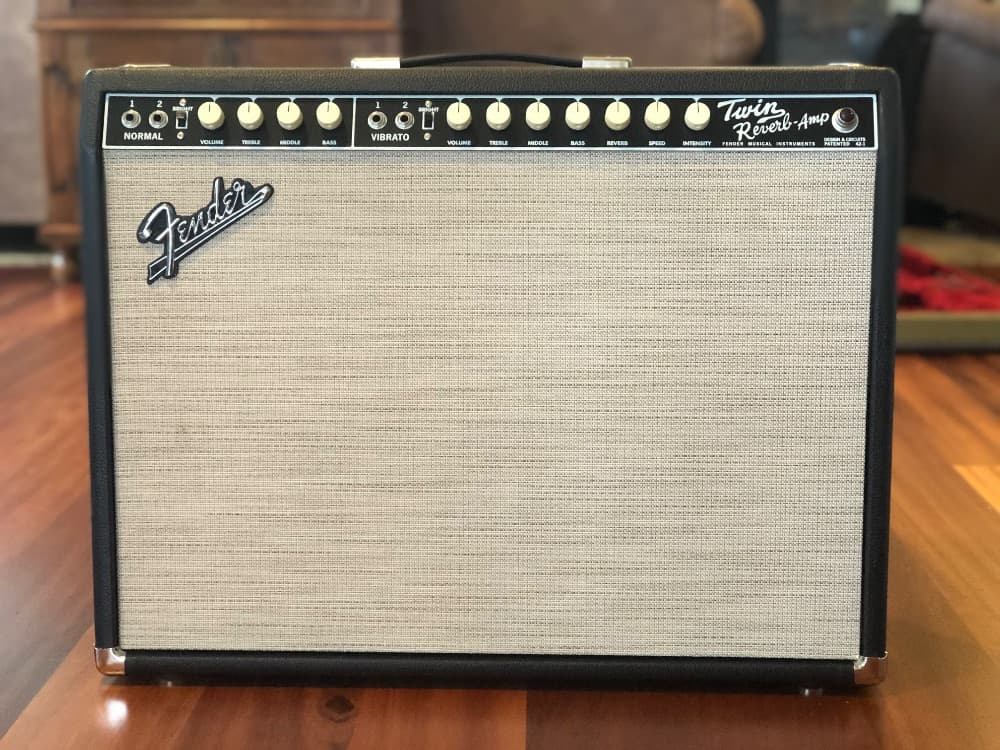
Want to add reverb that syncs perfectly with your tempo? Or swap a Fender Twin for a Marshall Plexi with one click? Recording direct gives you total flexibility.
13,102
193
6
langley
· 11mo ago11 months ago
Download Neural Amp Model ➝ Fender Twin Reverb
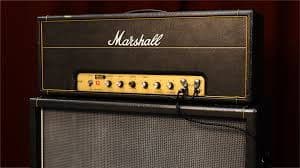

Download Neural Amp Model ➝ Marshall Plexi Super Lead
Mic'ing an Amplifier (for the Brave)
In professional studios, engineers often record both a DI signal and a mic’d amp. Doing this well takes patience — mic placement can dramatically change your sound. To try it yourself, you’ll need:
- A dynamic microphone (like the Shure SM57)
- A quiet room with decent acoustics
- Proper mic placement (an inch or two from the speaker cone, slightly angled)
Mic'ing captures the sound of your amp, cabinet, and room, but small changes can make big differences. That’s why many home guitarists skip it and record direct. You can always add realistic “mic’d cabinet” tone later using Impulse Responses (IRs) from TONE3000, which emulate real speakers and spaces.
Learn 5 Easy Ways to Mic a Guitar Cab
Add Effects After Recording
When recording direct, record your cleanest possible signal and save the effects for later. This gives you far more control and ensures your reverb, delay, and modulation sync perfectly with your session tempo. This “record-clean, mix-dirty” approach mirrors how professionals work, giving you studio flexibility without expensive gear.
You can find a really comprehensive list of free VST audio plugins here, but check out these free excellent tools first:
- Neural Amp Modeler (NAM) – Free, open-source amp modeling plugin.
- TONE3000 NAM Library – Thousands of real amp captures, free to use.
- LePou, Venn Audio, and Chowdhury DSP plugins – Free VST plugins offering overdrives, EQs, compressors, and other essential audio plugins for guitarists.
From Recording to Modeling
Once you know how to record clean DI signals, you can take the next step: modeling your own gear. Using NAM on tone3000.com lets you capture neural amp models of your favorite amps and pedals, preserving their sound forever. Upload your captures to TONE3000 and share your tones with other guitarists, or just explore what the community has uploaded.
Learn to Capture an Amp Tone with Neural Amp Modeler
A Simple Home Setup Checklist
Here’s all you need to get started:
- Guitar – Any electric guitar with a working output.
- Audio Interface – USB-powered with a Hi-Z input.
- DAW – Free or low-cost software like Reaper or GarageBand, or more expensive and more advanced DAWs like Pro Tools or Logic.
- NAM Plugin + IR Loader – Download from tone3000.com.
- Headphones or Monitors – To hear your mix clearly.
As you improve, you might add a good microphone, MIDI controller, or outboard gear. But remember: even pros often rely on software amp models and plugins more than hardware these days. It’s about creativity, not expensive equipment.
The Takeaway
Recording guitar at home has never been easier or cheaper. With a simple interface, a free DAW, and NAM profiles from TONE3000, you can explore the sounds of thousands of amps, cabinets, and effects without ever miking a speaker. So just start small, stay curious, and learn to use the studio as an instrument for your creativity.
Discover more
Get started with TONE3000